Getting Started - Write Your Own Custom Steps
In the previous tutorials, we have only used Built-in steps in our Feature Files with:
In this tutorial, we will demonstrate how to use a Custom Step that prints a message we give to the test run log. After writing and executing this test case, you can start using Context Objects, which provide even more flexibility, into your tests.
1. Get Started
Create a new Feature File called FeatureWithCustomStep.feature under the features directory. Next, fill it with the following content:

| Note |
|---|
| The step is highlighted in red and has a popup notification saying that it is unresolved. intaQt Studio provides useful inspections that help detect errors during test case development. When errors are detected in the file, a red marker will appear in the top-right corner of the editor. |
Define the step using one of intaQt's languages, in order to resolve the unresolved step. intaQt supports Steps Language files and UI Steps Language files.
2. Create New Steps Language File
Create a new directory to hold our Steps Language files:
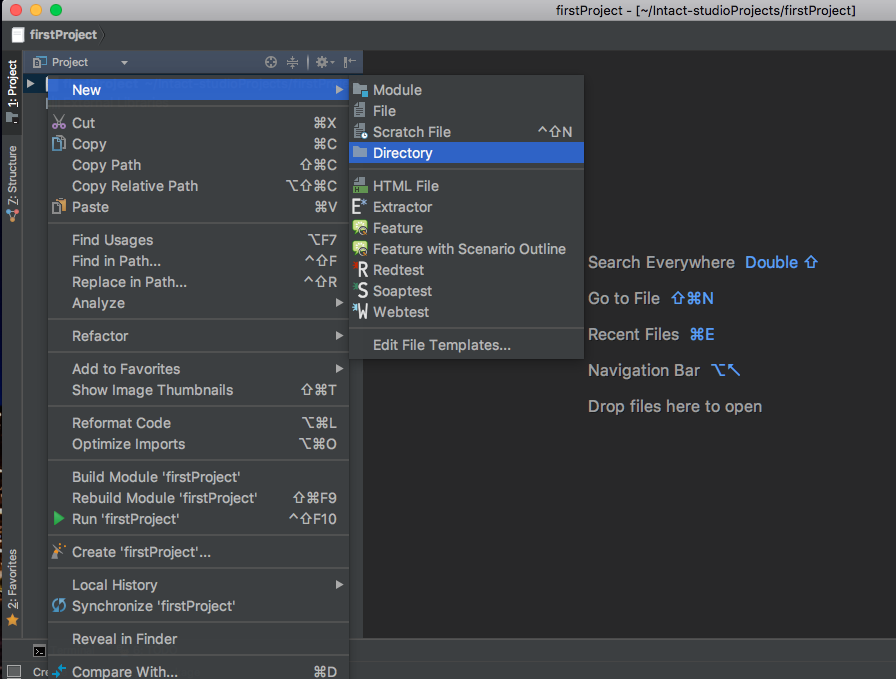
Name the directory lib. Next, right-click on the lib directory and select New -> Steps:
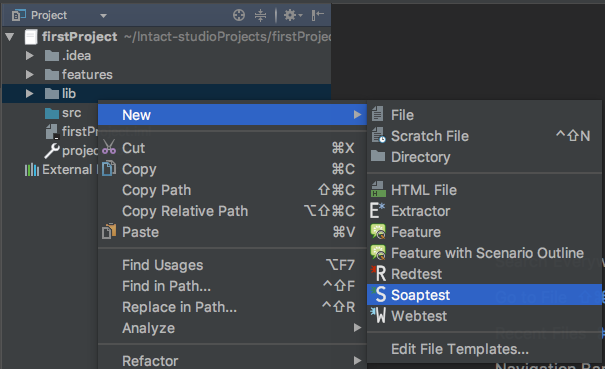
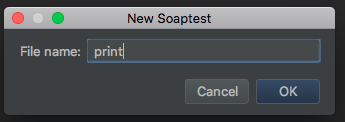
Name the new file soap. intaQt Studio will automatically add a .steps extension:
intaQt Studio generates the following template by default:
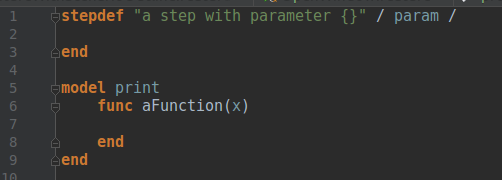
This reflects the structure of Stepsfiles, which may consist of Stepdefs, Models and Functions.
Stepdefs 
| Stepdefs |
|---|
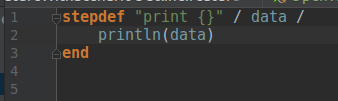
Stepdefs have a textual definition, and enable specifying parameters using the curly brackets {}. Each pair of curly brackets acts as a placeholder and must have a corresponding parameter name between the / … / construct. Arguments passed to the step when calling it will be bound to the name parameters. This makes them available inside the Stepdef's scope. For steps without parameters, the / … / construct can be ignored. |
Models 
| Models |
|---|
Models are used to structure common functionality that can be reused across multiple Stepdefs. They act as namespaces for different functions, which can then be invoked by ModelName.function(). |
Define the print step as shown below:
| Note |
|---|
The additional println function is a Built-in that prints a given object to the protocol during a test run. You might have also noticed that auto-completion is triggered while typing. This provides suggestions of available names to be used in the given context. |
You would expect the step we wrote in the FeatureWithCustomStep.feature Feature File to resolve, but this is not yet the case. If we try running it now, it will fail:

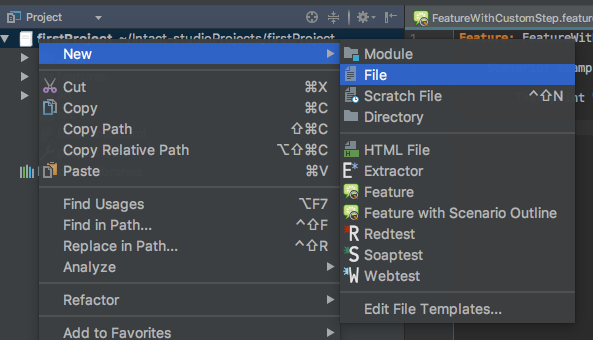
The step fails because intaQt needs to be configured and pointed to a location where it can find our custom definitions. This is achieved by the Glue.path Configuration. Project-specific Configurations are saved in a file called project.conf, located in the project's root directory.
Right-click on your project and select New -> File to create a new file:
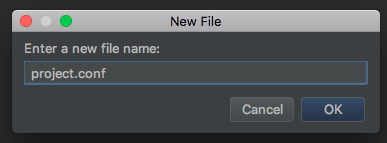
Enter the file name with the extension:
Define a Glue Path, as intaQt will recursively search for steps and uisteps files under the directories, and show the available Step Definitions:

Our project structure now look as follows:

See that the error is no longer there in the FeatureWithCustomStep file:

| Note |
|---|
| The green checkmark at the top-right corner, which means that no errors were found by the inspections. |
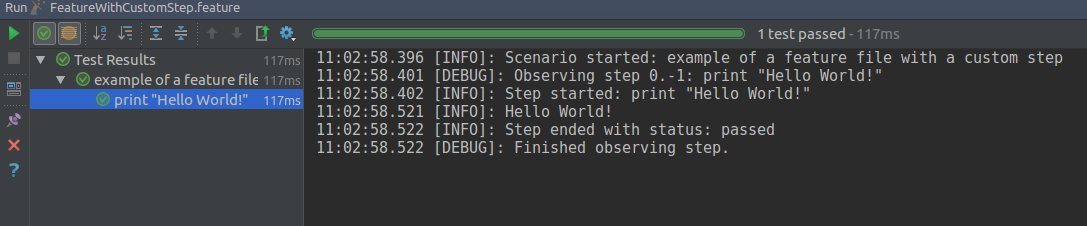
When executing the Feature File, we see the "Hello World!" output in the console, and the Scenario passes:
Conclusion
At the end of the first section of the intaQt tutorial, you should now be familiar with intaQt and intaQt Studio. We started out first creating a project and its directory structure, then wrote some Feature Files using Scenarios and Scenario Outlines and finally introduced the new concept of Custom Steps in this tutorial, which we implemented using intaQt's Steps language and linked to our test cases using a Glue Configuration.
In the next section, Getting Started - Working With Context Objects, we will teach you one last concept: Context Objects.