Getting Started - Expand the Feature File
In the previous step, we created and managed to run our first test case. We will now add some more Scenarios to the Feature File and incorporate Scenario Outlines.
After this tutorial, you can start making your test cases more flexible by using:
1. Prerequesites
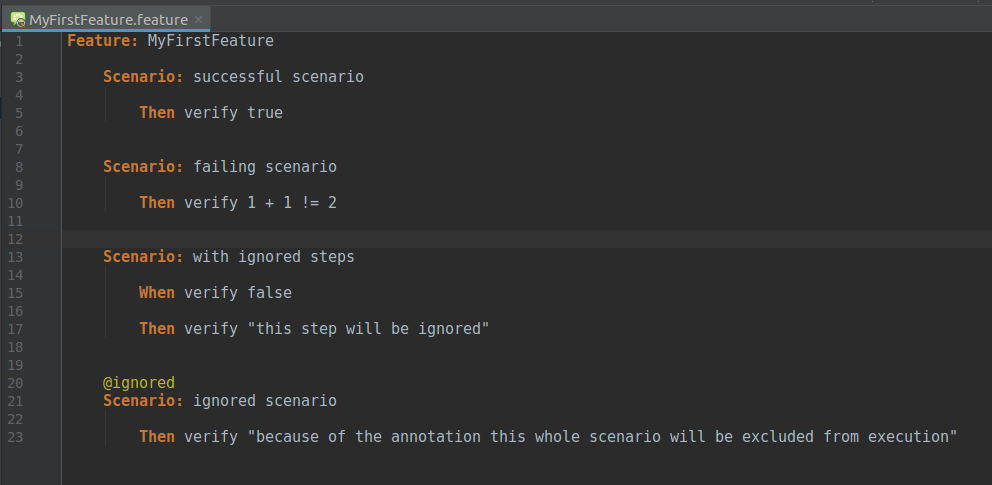
Update your test case so that it matches the Feature File below:
Run the expanded Feature File, and you'll see the following results appear in the console:
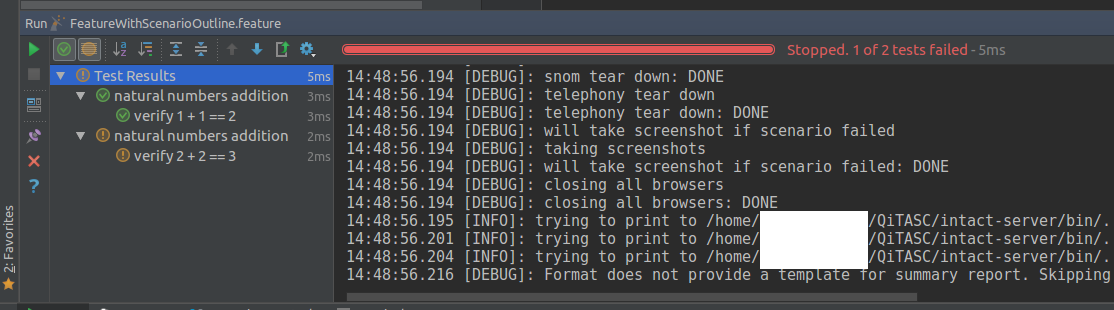
The test case failed because the second Scenario includes a step that fails. When a step fails, all subsequent steps will be skipped. In addition, the last Scenario in the Feature File was not executed at all because of the ignored annotation.
| Note |
|---|
By default, all Features/Scenarios with an ignored tag this will be excluded from the test execution, even if all steps before them pass. |
2. Default Run Configurations
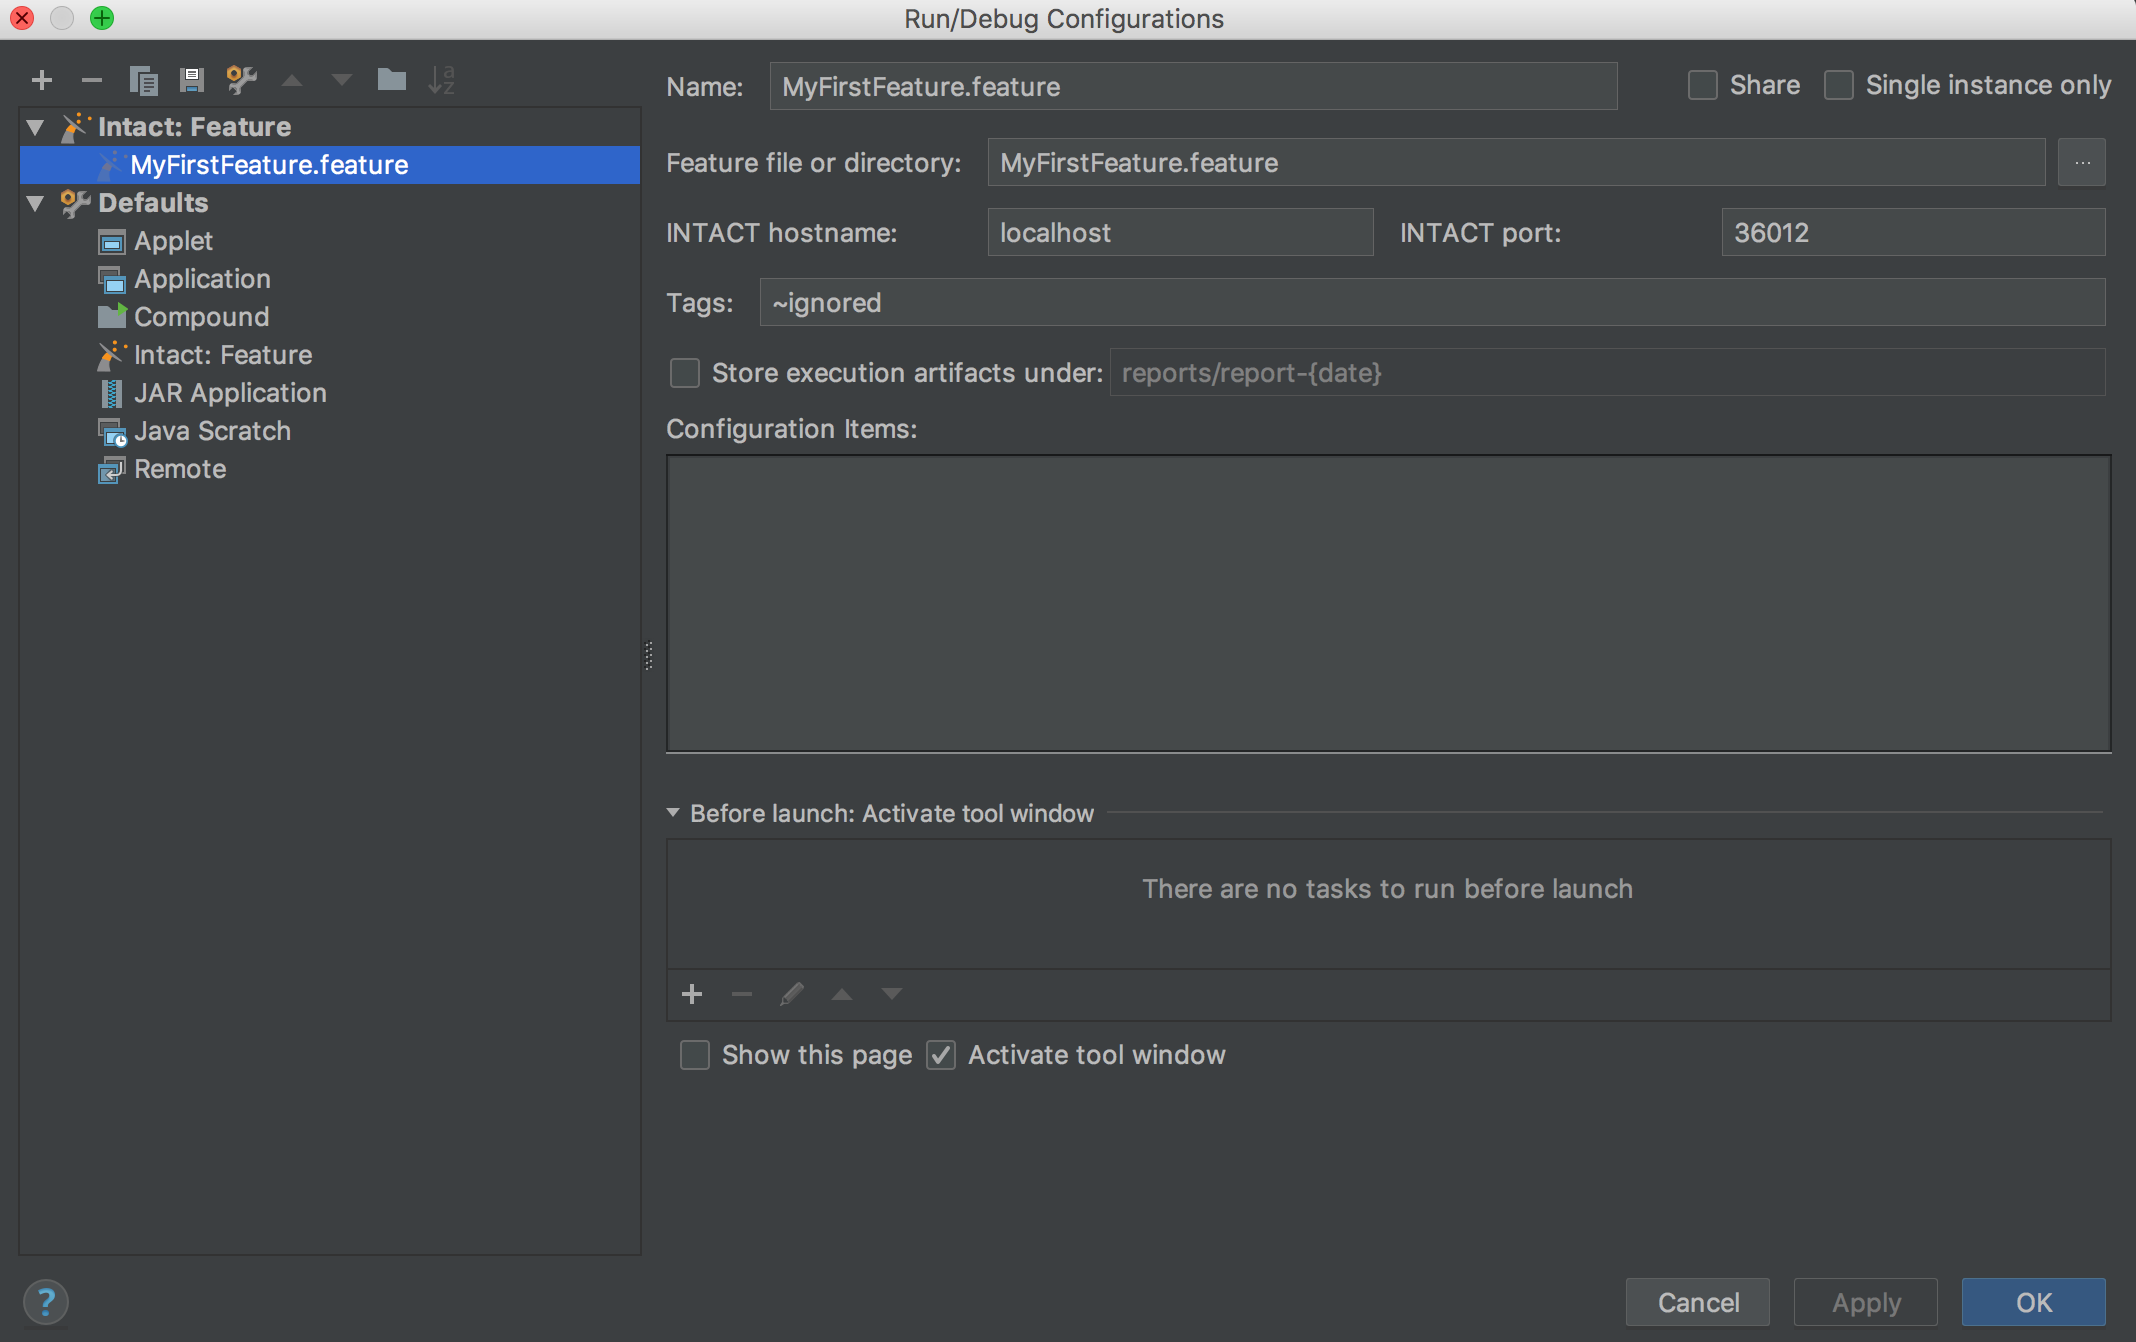
intaQt Studio creates a default Run configuration when running a new Feature File:
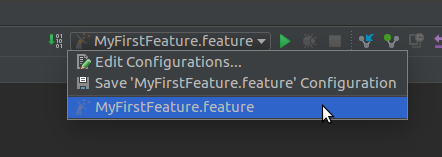
Change the default Configuration by clicking on the Edit configurations… dialog:
3. Writing a Feature File With a Scenario Outline
intaQt supports simple Scenarios, as well as Scenario Outlines. Scenario Outlines are introduced in Feature Files by the Scenario Outline: keyword, followed by a description of the Scenario. This keyword must be used, otherwise the test case will fail.
Create a new Feature File with a Scenario Outline by right-clicking on the files directory:
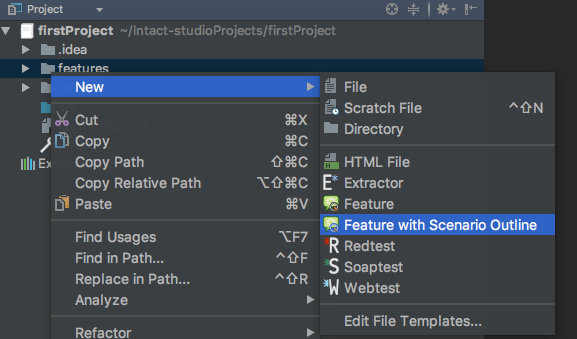
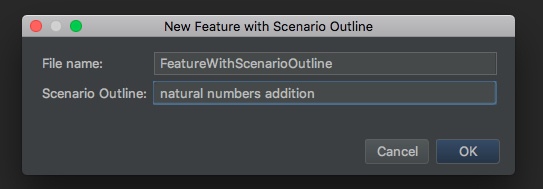
Select New -> Feature With Scenario Outline. We will name our new Feature File FeatureWithScenarioOutline. Again, intaQt Studio automatically appends the .feature extension:
| Note |
|---|
Upon creating the Feature File, a template will appear. A Feature File's parameters are enclosed within angle brackets <> and should be present in the examples. When running this test, intaQt will iterate over all examples, and will execute the scenario once for each example, replacing the parameters specified in the steps with the values from the Examples: table. |
Enter the same text as in the Feature File below:
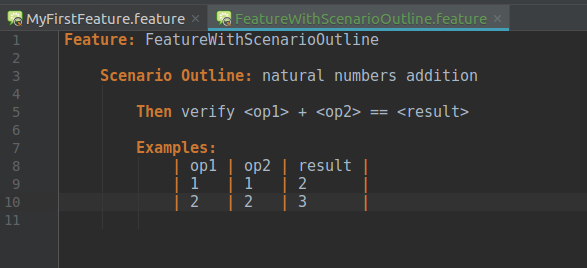
The first execution will be successful, whereas the second will fail because 2 + 2 is not 3:
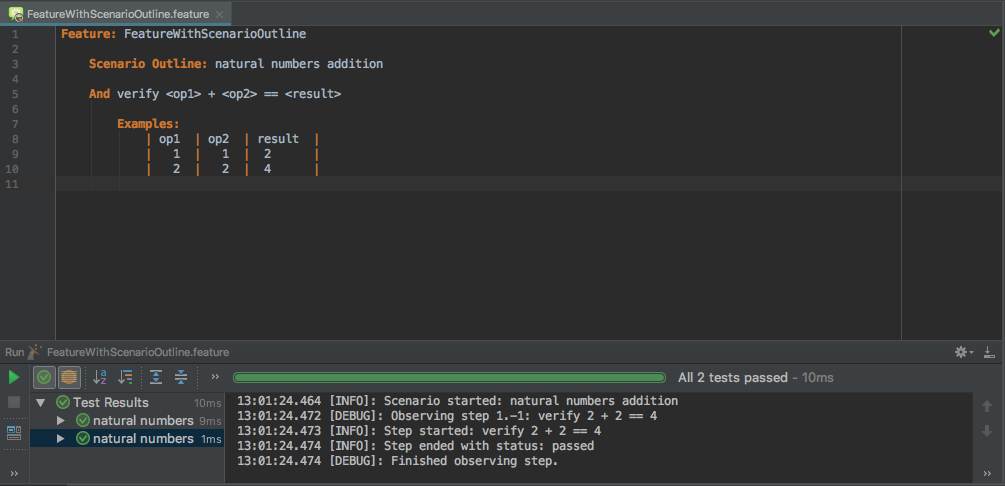
Update the test case to the following and run it again. The test case will pass and it should look like the following:
Conclusion
In the previous tutorial, we showed you how to create an intaQt project, execute a Feature File and find its report. We built upon those concepts in this section by adding a Run Configuration and developing Scenario Outlines. In the next tutorial, Getting Started - Custom Steps, we will develop Custom Steps using intaQt's custom Steps language.