Configure and Run Jenkins
Now that you set up your intaQt Client project, you can configure Jenkins so that it will run the intaQt project build.
1. Add Environment Variables on the Jenkins Server 
Configure three global environment variables so that intaQt and Jenkins can communicate with each other.
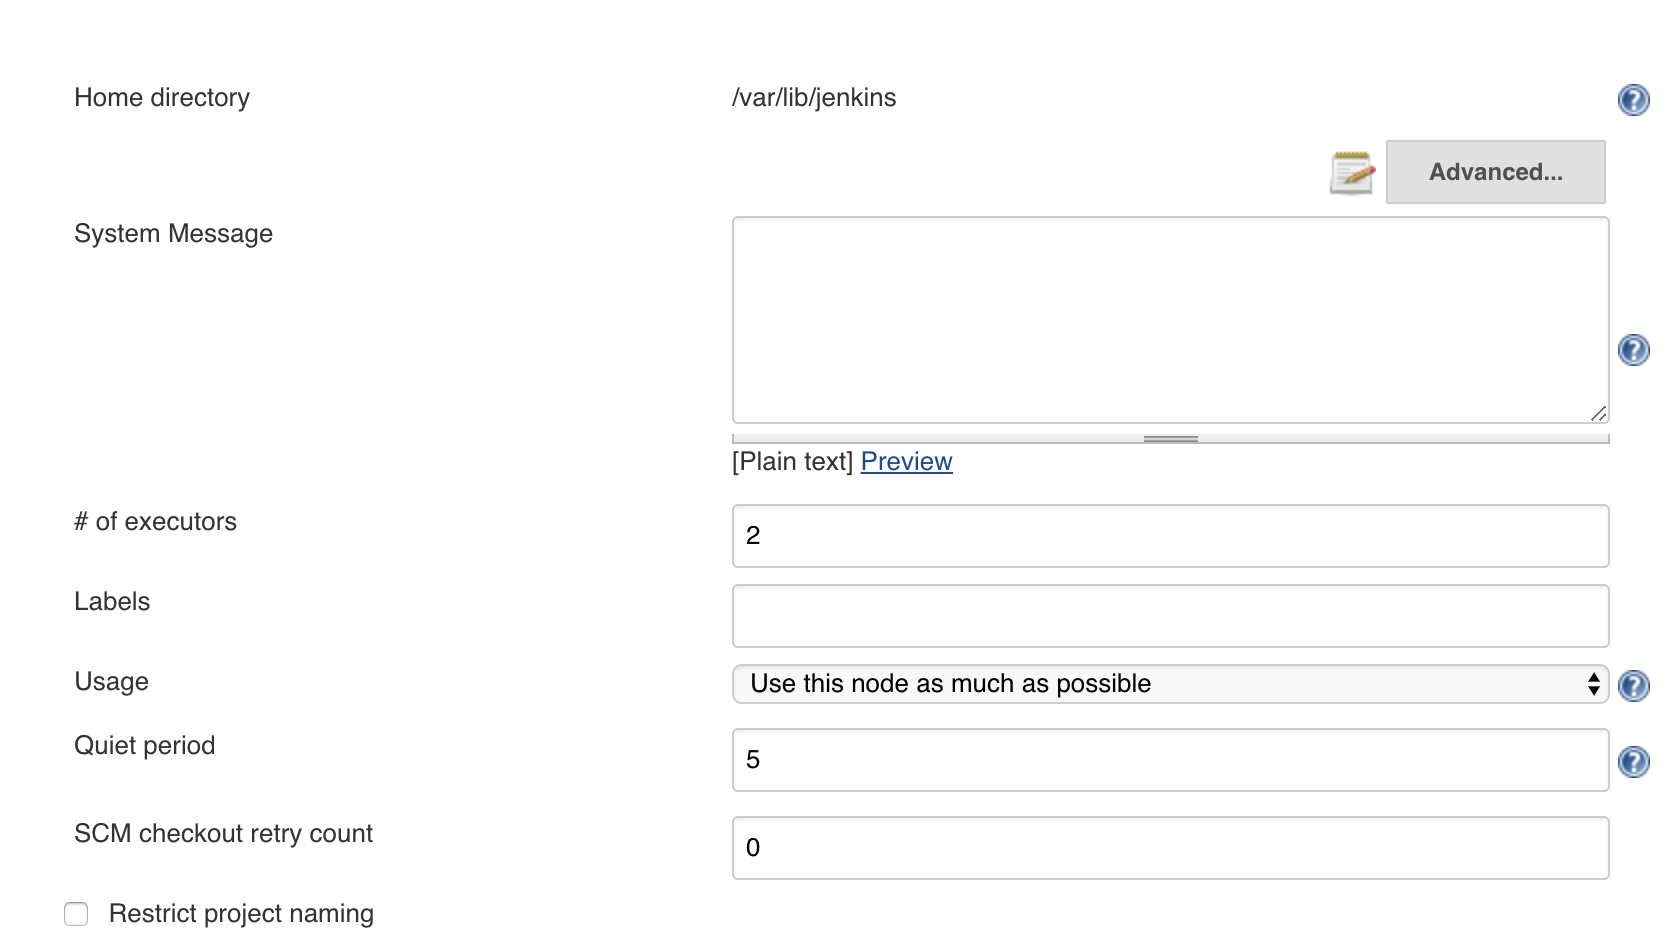
Select Manage Jenkins from the left-hand menu, then select Configure System, which will result in something like this:
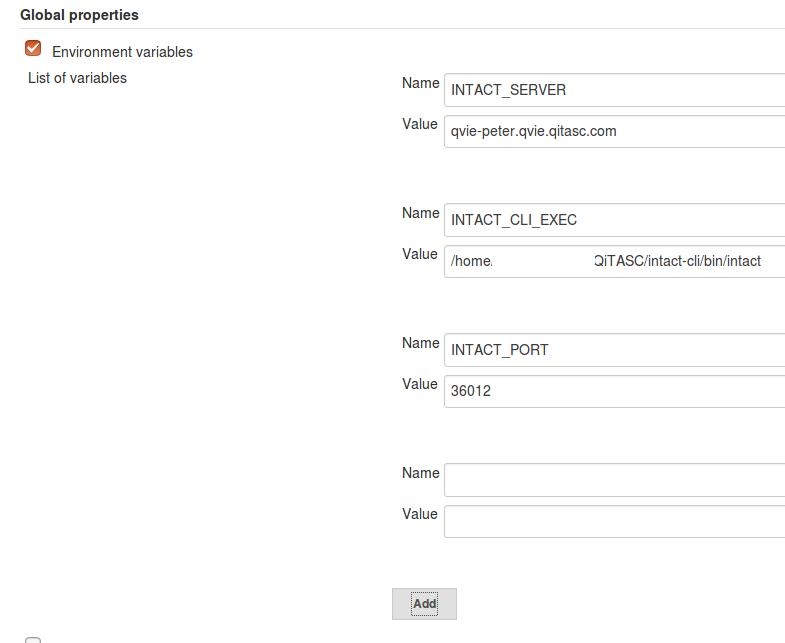
Find Global properties, and configure your environment variables.
Define an environment variable for each one of the following:
-
INTAQT- intaQt hostname. -
INTAQT_CLI_EXEC- Location of the intaQt Client on the agent.- When there's more than one Jenkins agents, intaQt Client must be installed in the same location as each Jenkins agent.
-
INTAQT_PORT- intaQt port, which should be36012, unless configured otherwise when creating your project.
Example
2. Configure the Jenkins Build Projects - Create a New Build Project 
Select New Item -> Freestyle project from the left-hand menu:
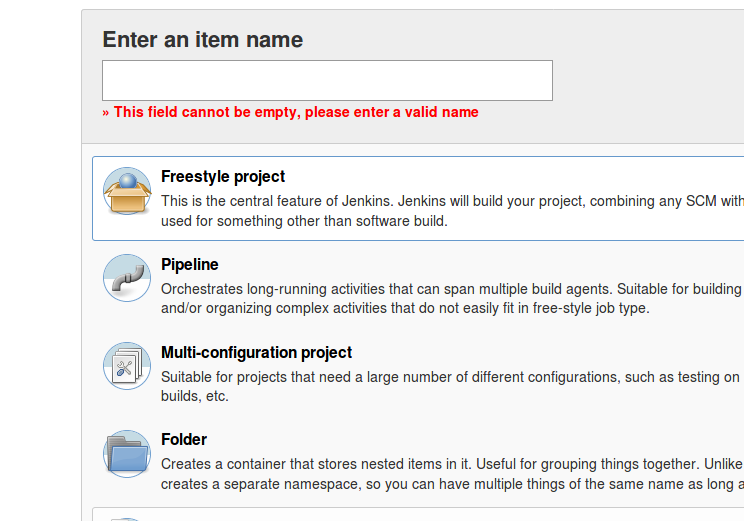
Assign the project a name of your choice, then scroll to the bottom of the page and click OK.
3. Configure the Source Code Management 
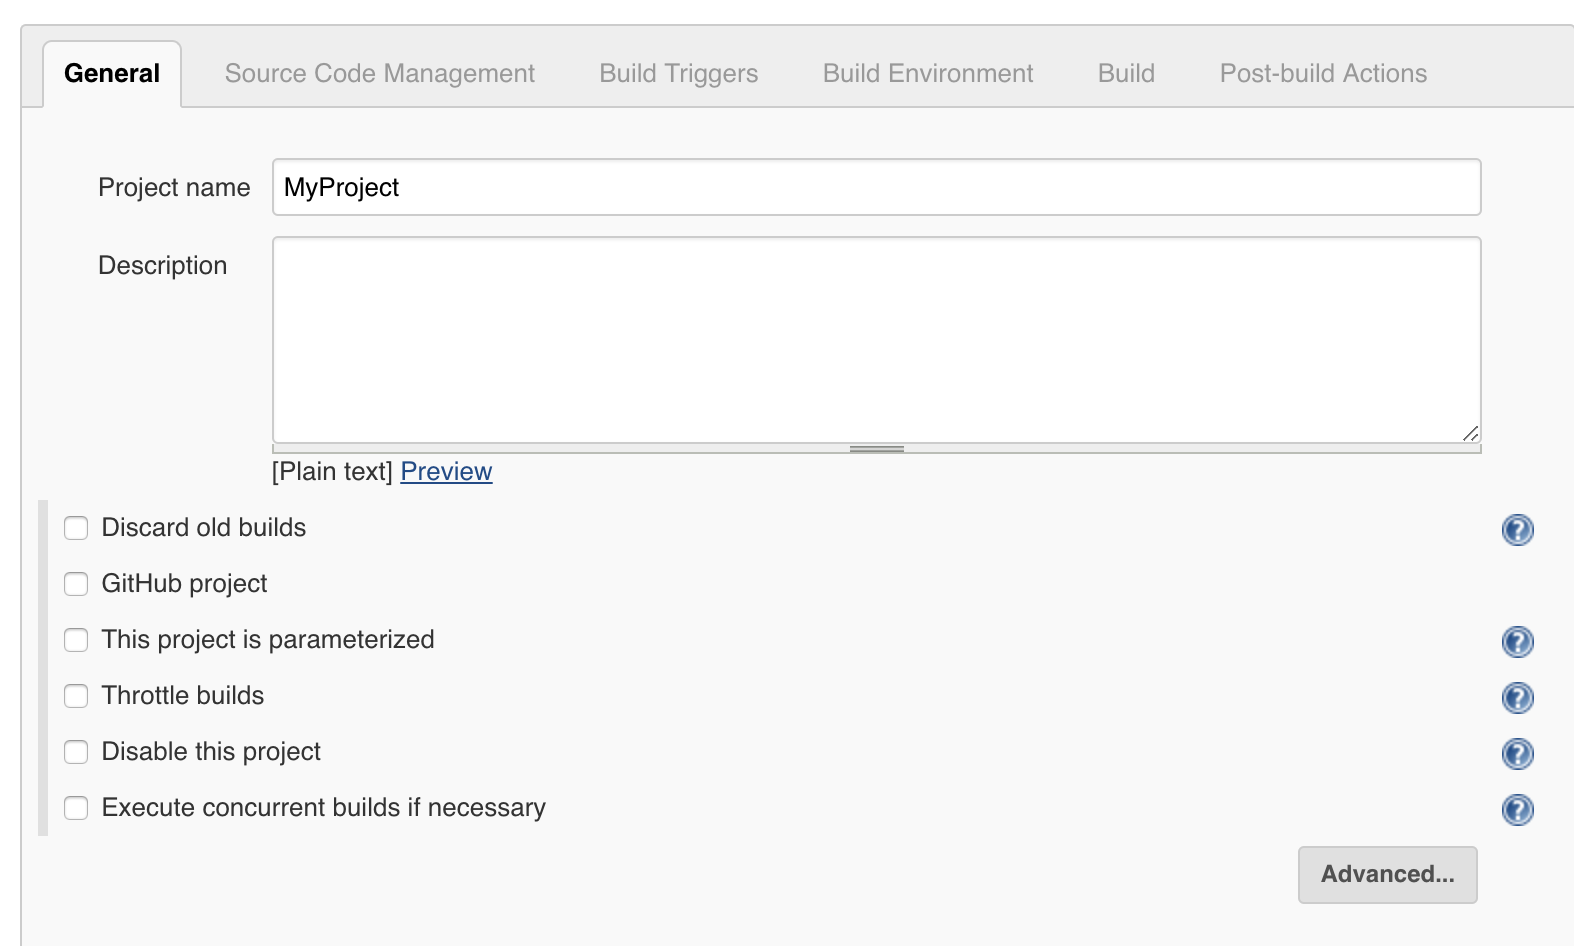
Assign your project a name and clicking OK and the following view should appear:
Select the Source Code Management tab, then configure the version control tools you are using for your project:
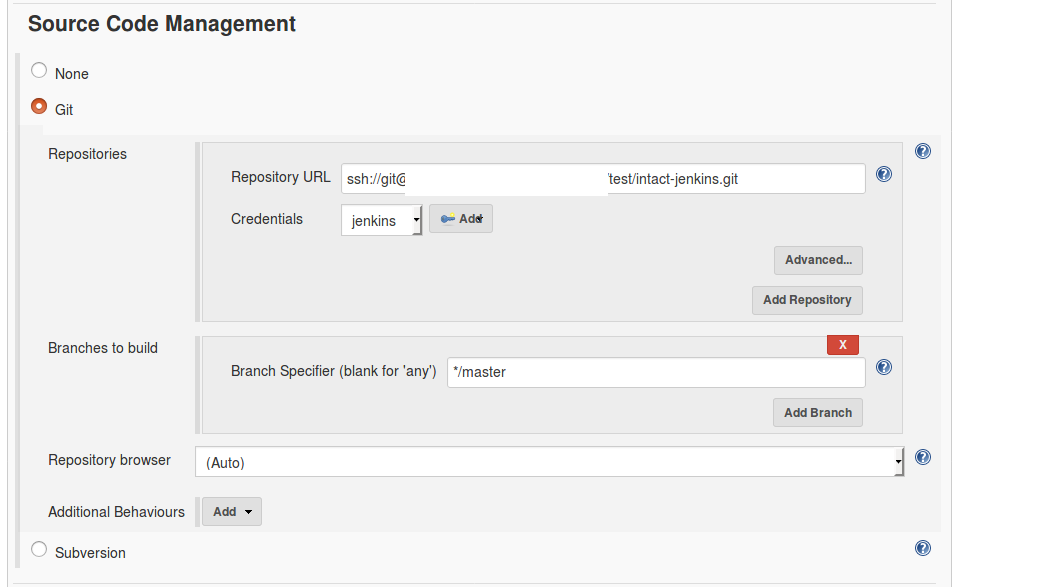
| Note |
|---|
If you are not sure what to put here, contact your administrator. Whether using Git or Subversion, select jenkins from the Credentials menu. |
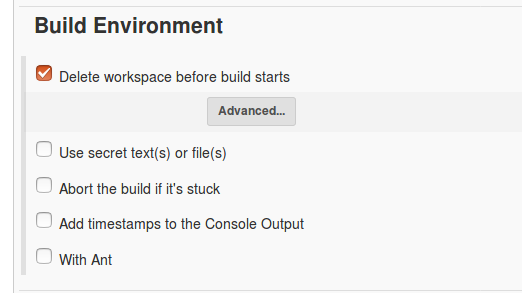
4. Configure the Build Environment 
Scroll down and click the Delete workspace before build starts box:
5. Configure Build 
Select the type of step you'll use to run the build in the Build section. For this example, we will use a Linux agent and choose Execute shell.
Enter the following command into the text box:
1 | $INTACT_CLI_EXEC test -h $INTACT_SERVER -p $INTACT_PORT HowTo-IntactClient |
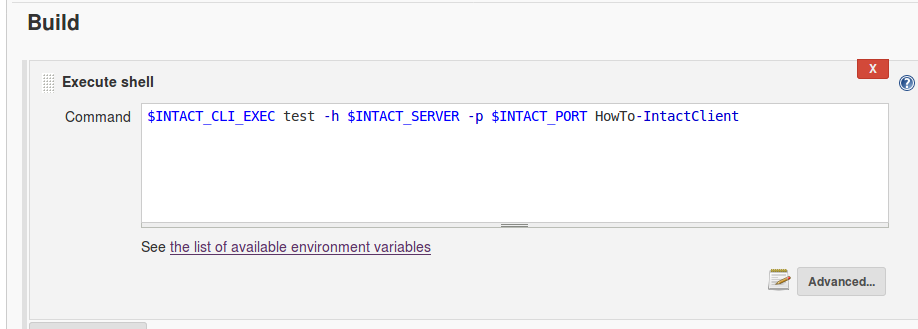
If you have already used our intaQt Client Tutorial to execute features on a remote host, or used intaQt Client, then the syntax may look familiar to you. The only difference is that we are using environment variables to represent parameters:
-
The host, indicated by
-h, which we configured with the environment variableINTAQTabove. -
The port, indicated by
p, which we configured with the environment variableINTAQT_PORTabove. -
Additionally, the folder where the intaQt Feature Files are is specified as
HowTo-intaQtClient.
Execute the same project via intaQt Client, the syntax should look like:
1 | ./intaqt test -h qvie-peter.qvie.qitasc.com -p 36012 HowTo-intaQtClient |
6. Configure Post-build Actions 
Add two post-build actions:
-
Archive the artifacts
-
Publish JUnit test result report
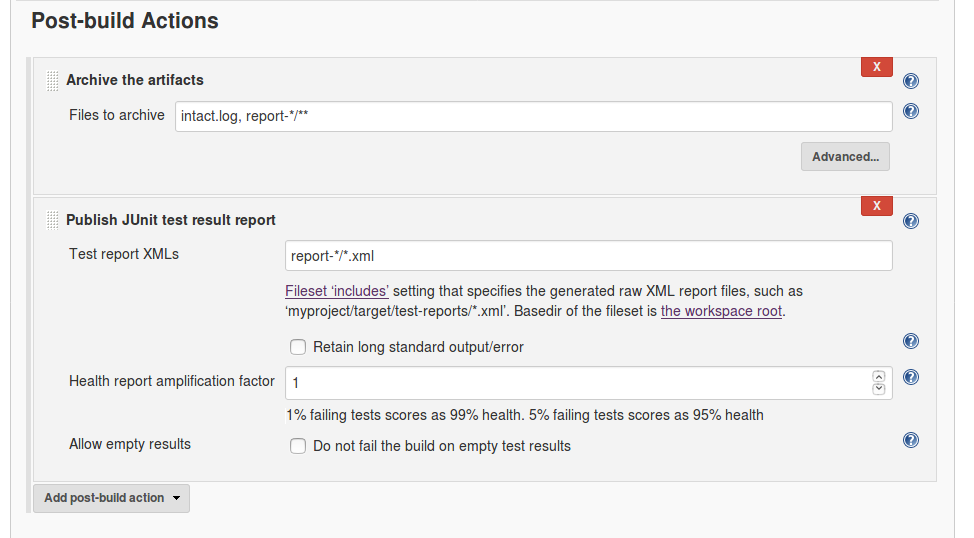
7. Archive the Artifacts 
Store intaQt Client's intaqt.log file for each run, as well as its report folder.
Select Archive the Artifacts option from the Post-build action menu, and enter the following into the Files to archive field:
1 | intaqt.log, report-*/** |
8. Publish JUnit Test Result Report 
Select Publish JUnit test result report from the Add post-build action menu and enter the following into the Test reports XMLs field:
1 | report-*/**.xml |
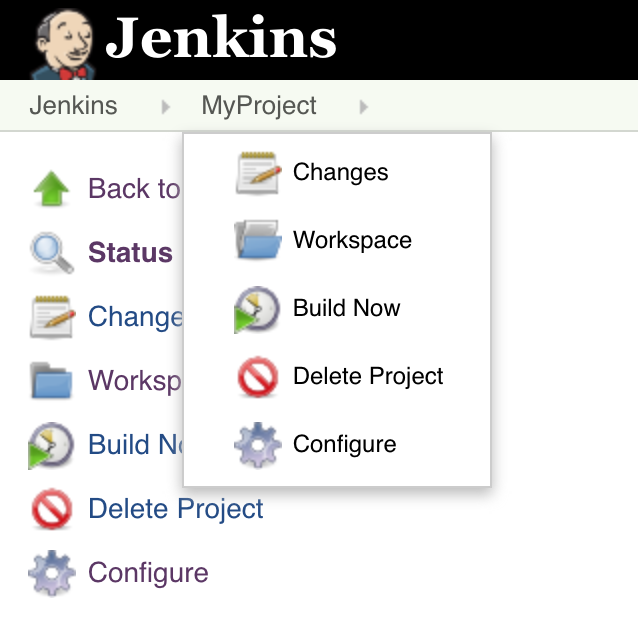
9. Run the Jenkins Build 
Select Build Now from the drop-down menu containing your project's name. In our case, the project name is MyProject:
See that your project is being executed on the status bar that will appear:
