Installing and Starting intaQt
intaQt License Requirements
To install an intaQt web license:
- An intaQt License (ending with
.licor.license, depending on the license type)
To install an intaQt License without a web licence:
-
A card reader
-
A license card
If using a card reader, connect it to the computer and insert the license card.
Note:
The server.license is the license code. It is not intaQt itself. intaQt needs to be manually installed. Instructions for installing intaQt products are available under the QiTASC Cockpit.
1. Create the QiTASC Directory
Note: If the QiTASC Cockpit has already been downloaded and successfully launched, skip to the Installing the Required intaQt Applications section.
First, download the QiTASC Cockpit:
-
Cockpit for Mac OS X - Download using Firefox or Chrome: If using Safari, the browser may add an extension to the URL.
This will download a file called qitasc (lowercase).
Next, launch the application. This will create a folder called QiTASC in the home directory, for example: /username/QiTASC, where all intaQt-related folders and files will be downloaded and stored by default.
Linux or Mac OS users may see a message stating ...qitasc does not exist appears. If so, the user execution permissions need to be set. First, use the command line to navigate to where the qitasc application is stored. Then enter:
1 | chmod u+x qitasc |
Next, move the qitasc application into the main QiTASC directory.
2. Download the Required intaQt Applications
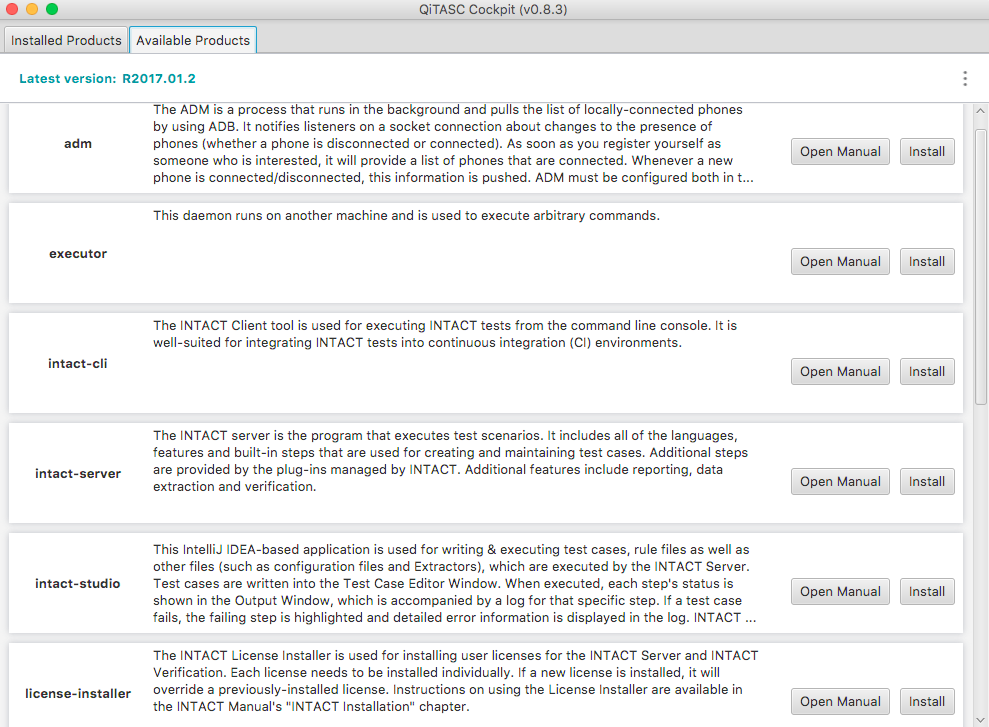
There are two ways to install intaQt applications. The first is by double-clicking on the QiTASC Cockpit, which is the file named qitasc. An application with tabs for Installed Products and Available Products will open:

The files products intaqt, intaqt-studio and license-installer are mandatory to install.
The following applications are also available, and may need to be installed depending on test case requirements. Descriptions are listed next to each in the QiTASC Cockpit:
-
appium
-
executor
-
intaqt-cli
-
phone-service
-
sharky
-
trigger
-
verification
-
verification-ui
Note: Check the Cockpit from time to time for any updates on any of the applications.
3. License Installation
To start the installation, save the license (ending with .lic or .license) to the desired directory. Next, navigate to the QiTASC directory from the command line.
To install the intaQt License, enter:
Windows Users
1 | qitasc launch license-installer intaqt <filepath Path>/<intaqtLicenseName>.license |
Linux and Mac OS Users
1 | qitasc launch license-installer intaqt <filepath Path>/<intaqtLicenseName>.license |
Parameters
-
filepath - The location of the license file
-
intaqtLicenseName - The license file's name
Example
1 | qitasc launch license-installer intaqt license-installer/bin/john-doe-server.license |
Note: To install licenses with profiles, refer to Running Multiple intaQt on a Single Machine.
License Installation via the license-installer
Alternatively, intaQt's licenses can also be installed by running the license-installer directly. In order to do so, change to the main directory, for example QiTASC/license-installer/bin and run the following command:
Syntax
1 | license-installer <product Product> <filepath Path> |
Parameters
-
product - The product to be installed, either one of
intaqtorintaqt-verification -
filepath - The location of the license file
Example
1 2 | cd license-installer/bin/
license-installer intaqt license-1.license
|
Note:
Linux and Mac OS users may need to enter ./ at the beginning of each command.
4. Verification License Installation
To launch the Verification License, enter:
Windows Users
1 2 | qitasc launch license-installer
intaqt-verification <verificationLicenseName>.license
|
Linux and Mac OS Users
1 2 | qitasc launch license-installer
intaqt-verification <verificationLicenseName>.license
|
intaQt and intaQt Studio applications may be installed by pressing the Install button next to their name in the Cockpit GUI.
APK Files
The following APK files are included with intaQt, which will be installed on the phones being tested:
-
android-data-plugin.apk
-
android-intaqt-app.apk
-
android-telephony-plugin.apk
5. Starting intaQt
Instructions for Starting intaQt Manually
-
Start intaQt by double-clicking on the
intaqtapplication, which is located in theQiTASC/intaqt/binfolder. -
Open the intaQt Studio IDE, which is located in the main
QiTASCfolder.
Starting intaQt from the Command Line
The QiTASC Cockpit can be used to launch all QiTASC applications. First, navigate to the QiTASC directory.
Launch intaQt by enterring enter:
1 2 3 4 | qitasc launch intaqt
## launch intaqt with ADM
qitasc launch intaqt -a
|
Next, launch intaQt Studio by entering:
1 | qitasc launch intaqt-studio |
Mac OS users may need to add a ./ before the qitasc command. For example, ./qitasc launch intaqt -a.
Upon opening intaQt Studio, start a new project. A Connected icon will be visible in the status bar at the bottom right-hand side of the window:

Note: intaQt Studio will only display the Connected icon if intaQt's startup was successful. If the startup of intaQt fails, intaQt Studio stays in the Disconnected state. If the intaQt Studio is in a Disconnected state, make sure that intaQt have been successfully launched.
6. Troubleshooting: "Product not installed"
If an error message Product not installed appears, this means that the product is not currently installed. To confirm this, navigate to the QiTASC directory and run qitasc list (Windows users) or ./qitasc list (Linux and Mac OS Users). This will show all available products, with an i next to those that are installed.
Example
1 2 3 4 5 6 7 8 9 10 11 12 | i appium executor i intaqt-cli i intaqt i intaqt-studio i license-installer i manuals i phone-service sharky trigger verification i verification-ui |
Entering qitasc install <productName> (Windows) or ./qitasc install <productName> (Linux and Mac users) will install the missing product. For example, ./qitasc install intaqt. These products can alternately be installed and launched from the QiTASC Cockpit GUI.
License Installation Troubleshooting
hs_pid Error & JVM Crash
Upon launching intaQt, if there is an hs_pid error and JVM crashes, then this means that Open SC is missing and must be installed. Install Open SC and restart intaQt.