Create an intaQt Project
To execute an Apptest, you first need to run the following products:
-
adm
-
intaQt -- with adm
-
intaQt Studio
The easiest way to do this is to open a Command Line/Terminal session and navigate to the QiTASC directory.
Enter the following: Windows Users
1 2 3 | qitasc start adm qitasc start intaqt -a qitasc start intaqt-studio |
Linux and Mac OS Users
1 2 3 | ./qitasc start adm ./qitasc start intaqt -a ./qitasc start intaqt-studio |
The -a that follows start intaqt must be added so that the phones communicate properly with adm.
Run intaQt Studio
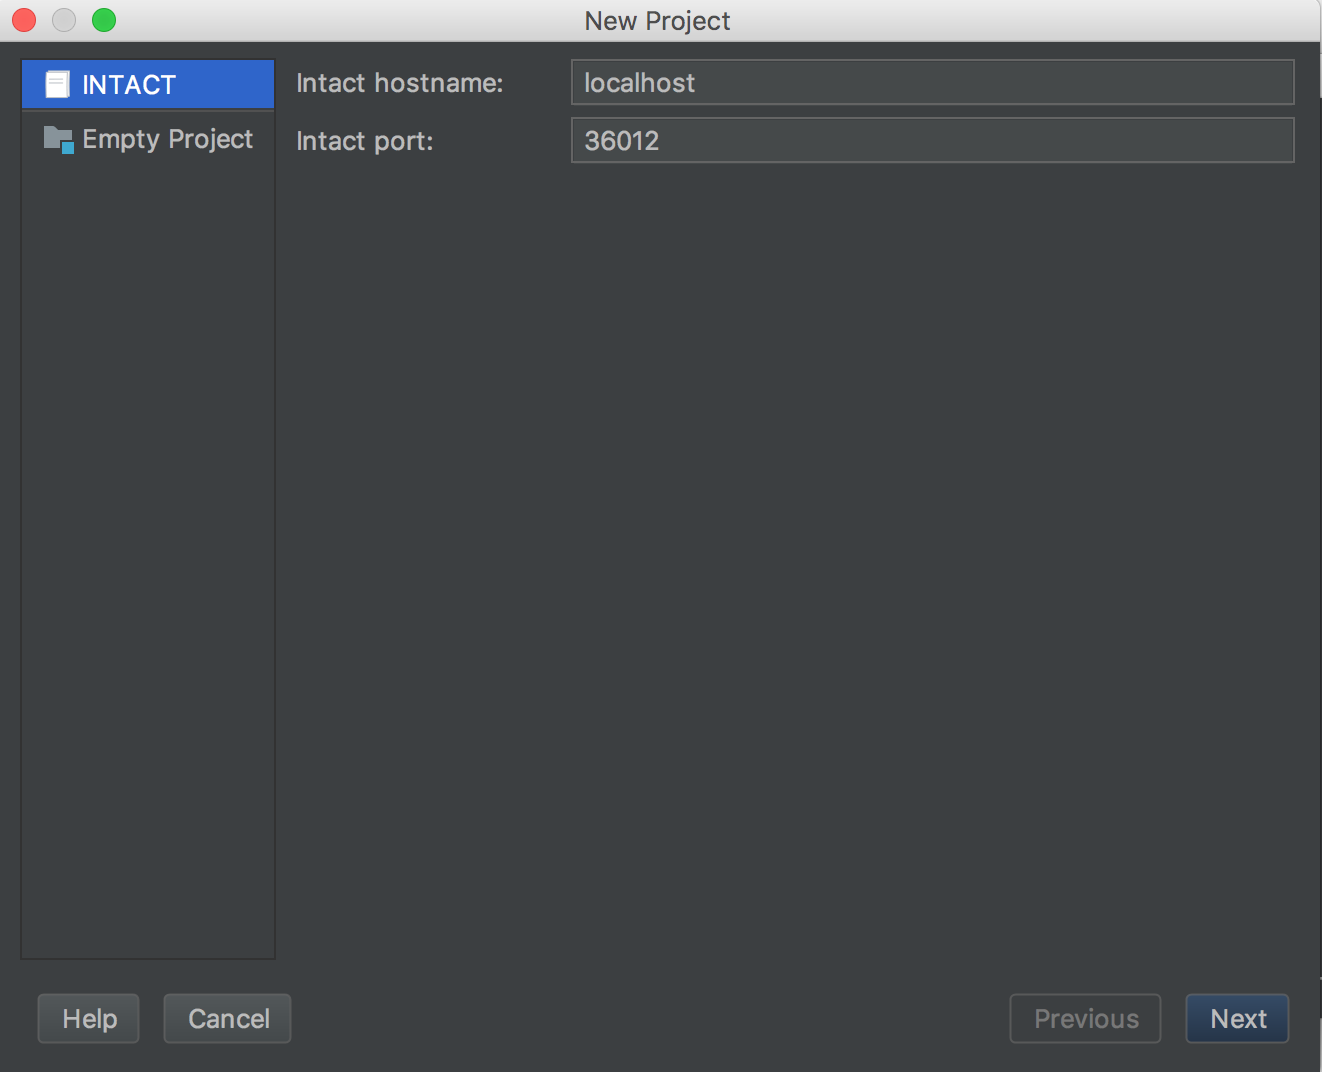
After launching the three products, intaQt Studio will start. First, select Create New Project.
The following view will appear. Select intaQt -> Next.
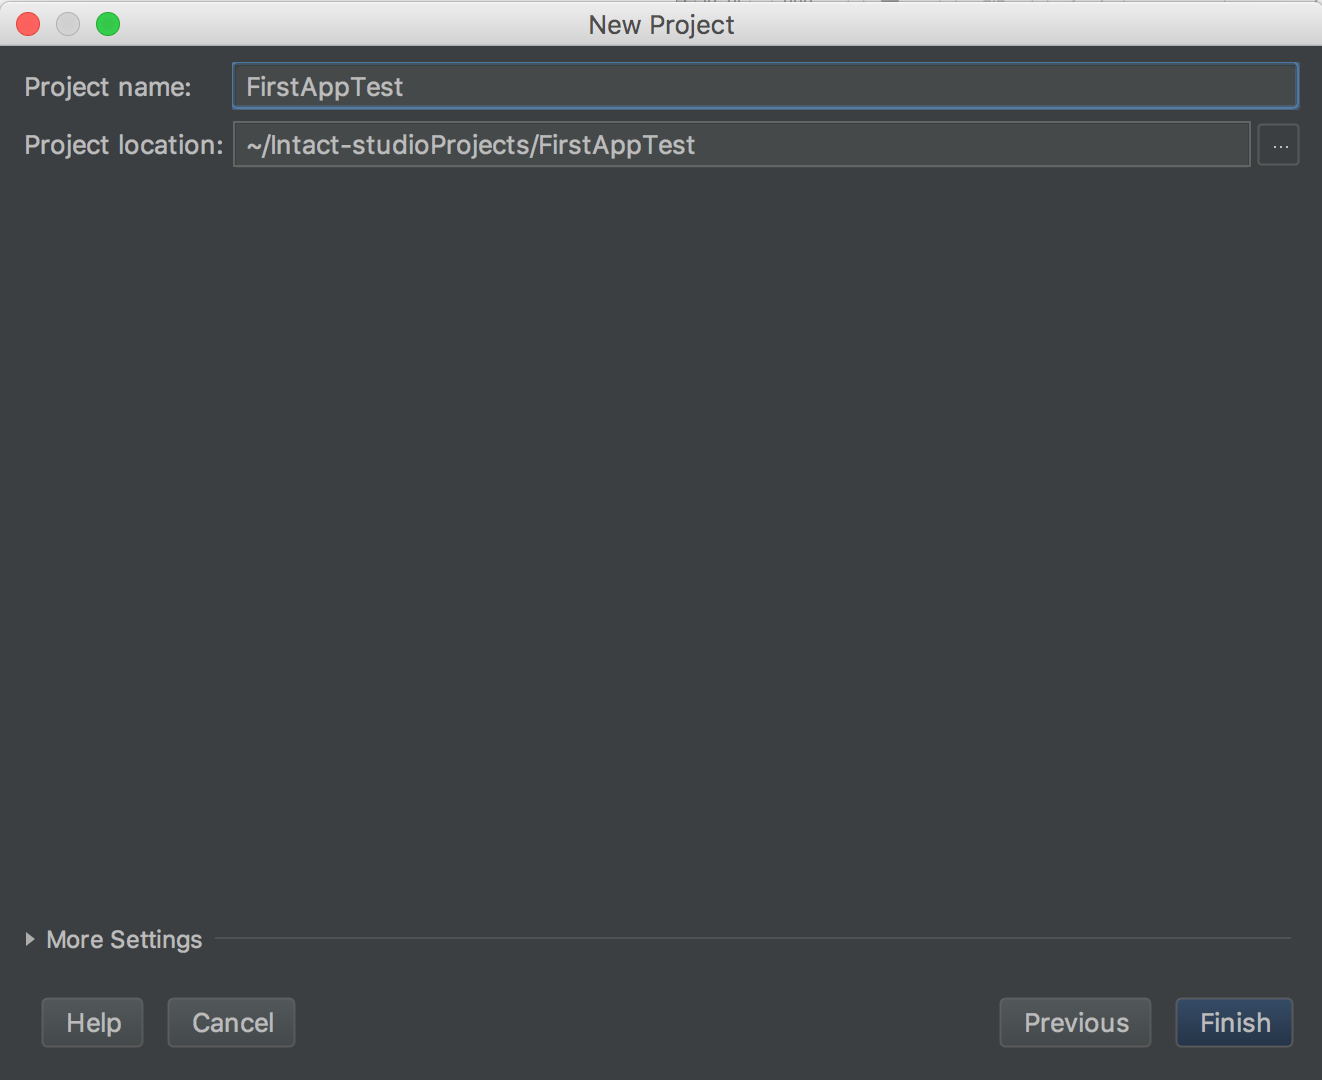
Next, name your project FirstAppTest and click Finish.
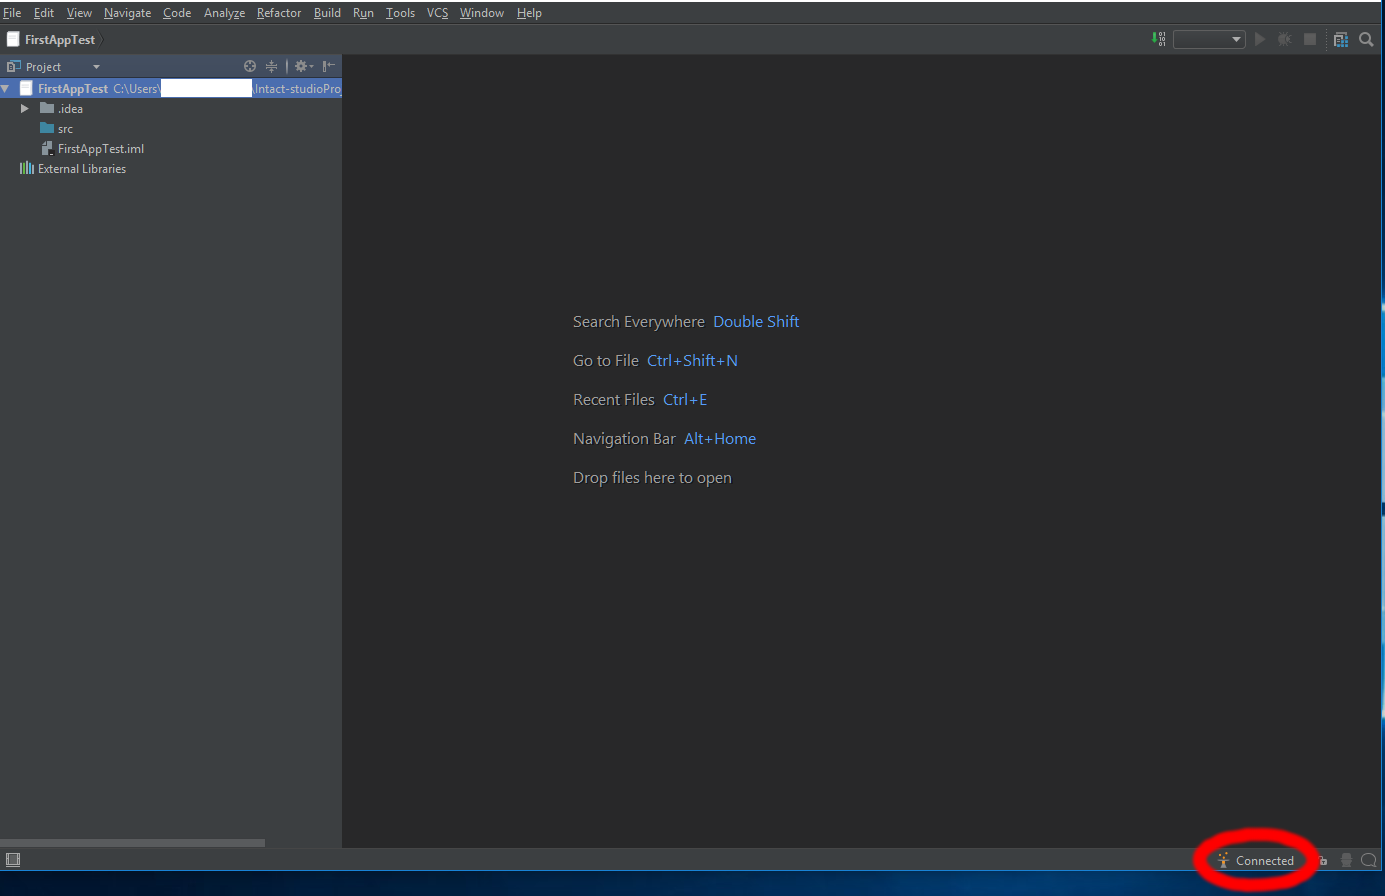
An empty intaQt Studio will appear - a Connected icon should be visible in the bottom right corner:
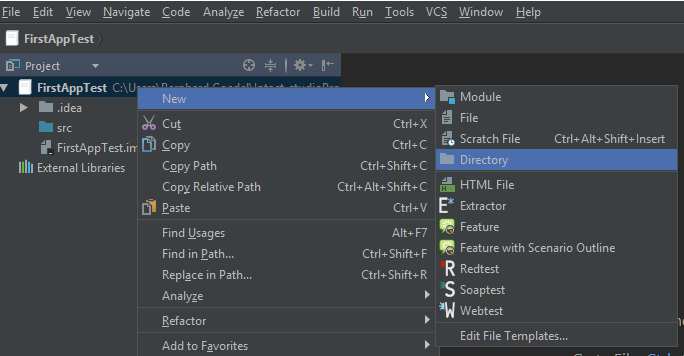
Create Resources Directory
Create a directory to store your APK file in. Although this is not necessary, we recommend this type of structure to help keep your Apptest projects organized.
First, right-click on the project name FirstAppTest on the left side of the window. Select New -> Directory. Name the new directory resources. Then, create a subdirectory by right-clicking on the resources folder -> New -> Directory. Name this one apks.
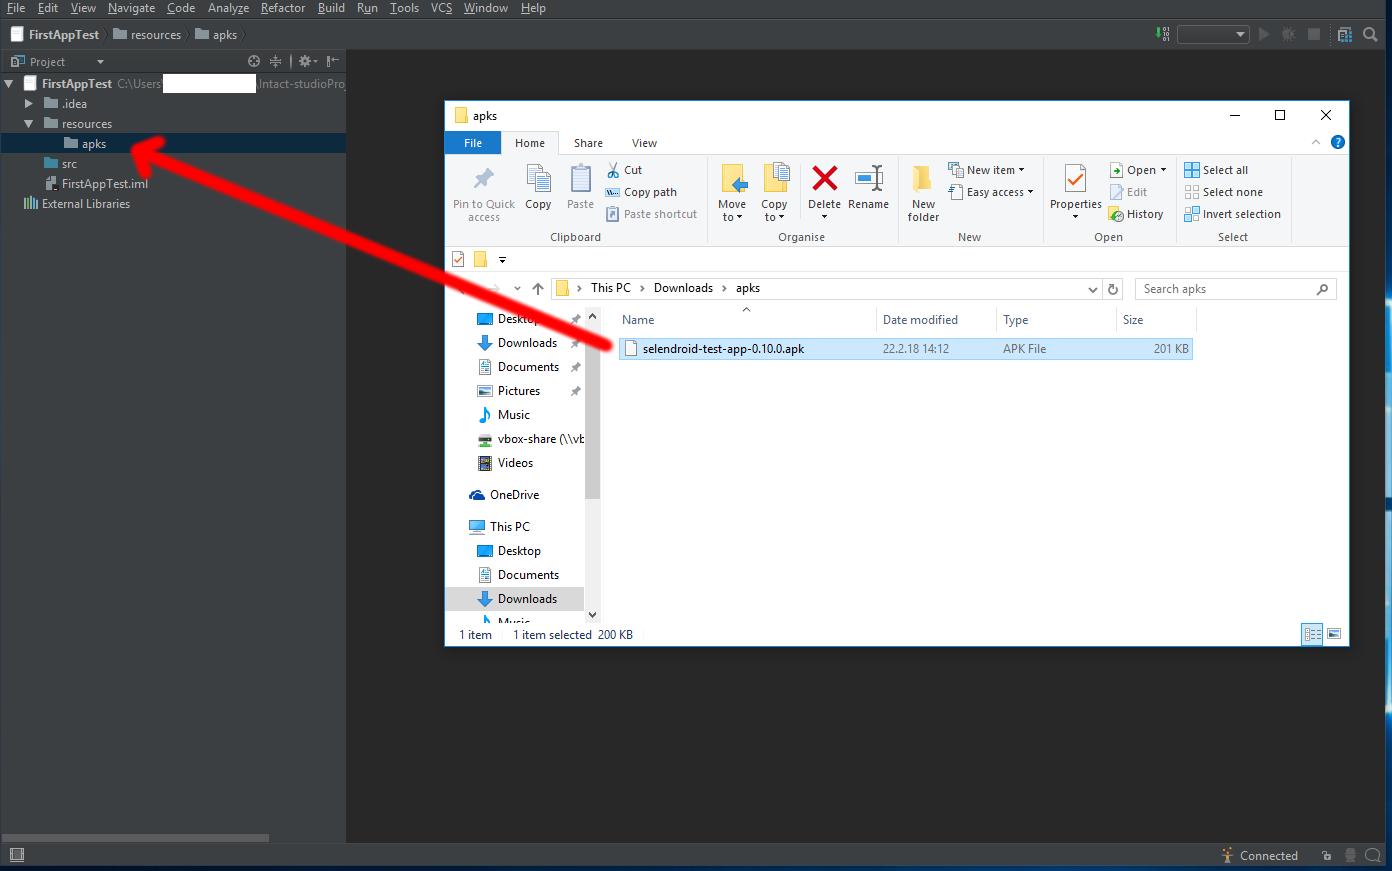
Add APKs to the Resources Directory
Drag and drop the Selendroid Test App apk into the newly-created apks folder in intaQt Studio:
Now that you have created a new intaQt project and imported your app's APK file, we'll move on to using Appium Desktop to get the UI elements you need to test.